When to plant bulbs?
Plant spring-flowering bulbs in September through to the middle of December. Usually, the earlier the bulbs are planted the better they’ll establish!
Autumn-flowering bulbs can only be planted in August and September.
Summer-flowering bulbs can be planted from March onwards, after the winter frosts, until the beginning of May.
If you haven’t got time to plant the bulbs immediately after you´ve received them, it’s best to store the opened box in a dry, dark, cool and frost free place. Some bulbs are wrapped in plastic. In this case make some holes in the plastic so the bulbs can breathe. Store in the fridge.
Preparing the ground in 3 steps
1) Weed out any persistent weeds
If you’re planting an area for the first time then it’s best to weed out any persistent weeds. However, in a wild garden you can choose to leave these ‘weeds’, making sure that they don’t take over in spring.
2a) Improve the soil – in a border or under deciduous trees and shrubs
Lightly dig in organic matter (preferably leafmould that is 2 or 3 years old or well-rotted compost). Take care not to damage existing roots of trees, shrubs and perennials too much, but make sure you really mix the organic matter in with the soil. If the ground is compacted then a small amount of wood chippings can be dug in. This improves the structure of the soil; a well-aerated soil is vital to the growth of the bulbs. A cultivator can be used to improve larger areas.

2b) Improve the soil – in a grassy area or if ground cover is already established
If a grassy area is being planted then you can chose to improve each individual planting hole (this requires more work whilst planting the bulbs, but does eliminate the need to remove the grassy top layer in its entirety). Before planting the bulbs spread a 3cm layer of leafmould over the grass, then aerate the ground using a mechanical hollow-tine aerator (solid-tine aerators result in compaction). This method also applies to planting in established ground cover, although the aeration of the soil should be left out.
When a lawn has become very hard and compacted then it is better to remove the turf; bulbs can’t push up through a dense matt. After the turf has been removed manure and aerate the ground as described in 2a, then lightly roll with a garden roller (not to heavy – for a third filled). The plot is then ready to be planted and resown.
3) Add lime and if desired an ‘autumn compost’
It is important to add some lime; one handful per square metre is sufficient. If you want to fertilise the ground to promote fast growth, use an ‘autumn compost’, also in the spring. ‘Autumn compost’ has a high percentage of potassium which is good for bulbs. However, use the fertilizer economically – a third of the recommended dosage (see package) is enough.

How many bulbs to plant
When the soil has been well cultivated and improved, our bulbs multiply readily. The parent bulbs make offsets (baby bulbs), and many bulbs are also self seeding. We therefore advise (in comparison with other bulb sellers) not to plant lots of bulbs per sq m, but to plant in moderation; nature does the rest! A good benchmark is 15 to 20 bulbs per sq m. After 3-4 years the bulbs will have naturalised and the desired result will have been achieved. However, if you want faster results, then use more bulbs per sq m. And if you’ve got the time, then use less.
If a mix of bulb species and varieties is being planted, then it’s advisable not to use more than 40 bulbs per sq m. When planting lots of bulbs in a small space, it’s all too easy to dig up a bulb that’s just been planted.
A beautiful and reasonably priced start can be made – for example for a new stinzen-meadow – by planting 25 bulbs per sq m.

Scattering bulbs
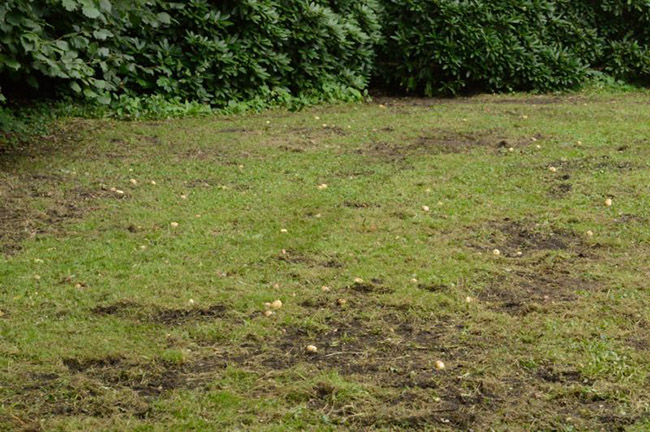
For the best effect in spring it’s really important not to plant the bulbs in neat rows or too close together, but to spread them naturally. Scatter the bulbs over the area and simply plant them where they fall.
This way the size of the groups will vary, some bulbs will be close together, and others will have rolled further afield, giving all in all a very natural appearance.
Admittedly it’s hard in established ground cover to find bulbs that have been scattered, so give the scatter-method in this case a miss! Do, however, keep in mind ‘the natural effect’ when planting.
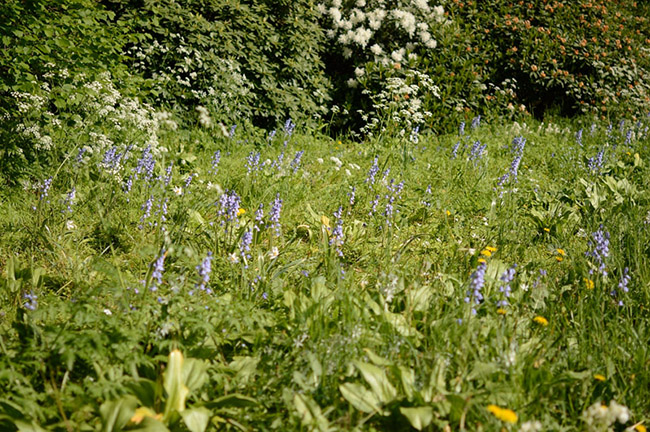
 The natural effect of this method of planting becomes clear to see, just like in this photo showing Spanish bluebells (Hyacinthoides hispanica) in the stinzen meadow at our garden, De Warande. We didn’t secretly move any of the bulbs after scattering them, we promise!
Planting depth
The planting depth is usually about three to four times the diameter of the bulb (5cm is the minimum and 12cm the maximum planting depth). Rhizomes are planted horizontally at a depth of about 3cm. Of course there are exceptions, and these are specifically listed under the plant descriptions. Planting instructions for individual species can be found on http://www.bulbsonline.org
And last but not least…
Cultivated, well broken up ground makes for easy planting. A matt for under the knees and a trowel will do the job. For planting larger bulbs a spade is sometimes better. Take care to mix the existing soil with the humus – the leafmould or the compost – in each hole. This is important because humus retains water and if a bulb sits in pure humus in winter, it can become too wet and will rot.
If you want to know more about leafmould then read our tips about maintaining bulbs.
We hope we’ve given you enough advice to get you started. Design tips and maintenance advice are also available to read on this website.
If you have any specific questions, then you can best contact us by e-mail: [email protected]